• Learn the warning signs of incorrect roof pitch and why New Hampshire residents should take note
• Follow a detailed, 8-step guide to measure your roof pitch accurately and avoid common DIY mistakes
• Discover the importance of proper documentation and why professional assistance is recommended
Recognizing Roof Pitch Problems
Noticing issues with your roof’s pitch early on can save you from costly repairs and structural damage. One clear sign of a problematic roof pitch is if you observe irregular slopes or sags along the roofline. This can lead to improper water drainage, which might manifest as water stains on ceilings or walls, indicating leaks. Another often overlooked indicator is difficulty in laying roofing materials due to an angled inconsistency, where shingles or tiles do not align or lay flat against the roof surface.
Misjudging the slope of your roof can also result in incorrect material purchases, leaving you with excess or insufficient supplies. If you notice unusual wear or damage to certain areas of the roof, particularly in places where water or snow may accumulate, it’s likely a sign that something isn’t quite right with your roof’s pitch. Moreover, homes in New Hampshire face the unique challenges of seasonal weather conditions, so ensuring precise roof pitch measurements becomes crucial for winter snow load management and spring thawing. Therefore, understanding how to calculate roof pitch in degrees isn’t just about numbers; it’s about preserving the integrity of your home.
Before you tackle this project, observe any challenges in accessing the intended areas for measurement, such as overgrown tree limbs or steep angles that could pose safety risks. A comprehensive inspection may reveal hidden issues such as rotten decking or unstable roof structures, which are critical to address. By taking the time to identify these signs and assessing your roof’s condition, you ensure that your efforts in measuring and rectifying the roof pitch are both accurate and effective, ultimately protecting your home from the harsh climates typical of New Hampshire summers.
Preparing for Accurate Measurement
Correctly calculating the pitch of your roof is not just a matter of precision; it’s also about being well-prepared. Prior to embarking on this task, it’s vital to clear any debris from the roof surface to ensure your measurements aren’t skewed. This will also give you a chance to inspect the condition of your shingles or tiles closer, checking for signs of wear that may need addressing. If you’re considering replacing your roof or undertaking significant repairs, visiting Adam Quenneville’s residential roofing services can provide you with professional guidance and assistance.
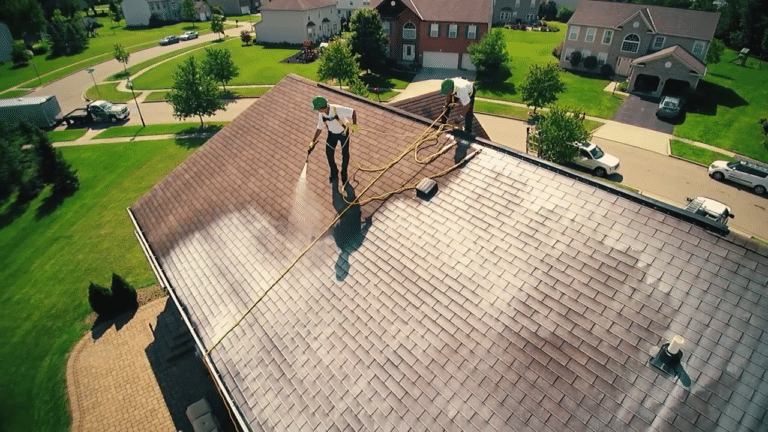
When you’re confident the roof is safe and ready for inspection, gather all necessary tools for the job. You will need a sturdy, reliable ladder to gain access to the roof—preferably one with a stabilizer bar for added safety. Additionally, equip yourself with a tape measure and a level, precisely what you’ll need for measuring the roof’s run and rise. Remember, incorrect measurements can have far-reaching consequences on the structural integrity of your home and may impact future maintenance or repair work.
Step 1: Gather Necessary Tools
Begin by obtaining a level and a tape measure, which will be essential for finding the roof pitch accurately.
Step 2: Ensure Safety First
Before climbing onto the roof, ensure safety measures are in place. Use a sturdy ladder, wear suitable footwear, and consider a safety harness for steep roofs.
Step 3: Access the Roof
Climb onto the roof carefully, or if it’s too steep or you’re not comfortable doing so, access the attic to take measurements from underneath.
Step 4: Measure the Run
Identify a level section of the roof you can measure, which is known as the ‘run’—typically a 12-inch horizontal segment of the roof.
Step 5: Measure the Rise
Hold the level at the roof’s run line, then measure vertically (the ‘rise’) from the end of the level down to the roof surface over a 12-inch span.
Step 6: Calculate the Pitch
Use the measurements to calculate the pitch of the roof. Pitch is the ratio of rise over run, expressed in degrees.
Step 7: Convert to Degrees
After finding the pitch, convert the ratio into degrees using a roof pitch angle calculator online for precision or referring to a conversion chart.
Step 8: Document Your Findings
Record the pitch degree measured. This information assists in determining the type of materials required for roofing projects and ensures adherence to building codes.
Common Mistakes to Avoid When Calculating Roof Pitch
DIY projects can be rewarding, but they also come with pitfalls that can affect the outcome of your work. When it comes to calculating roof pitch, accuracy is key, and common oversights can lead to serious structural and financial repercussions. By familiarizing yourself with these frequent errors, you can steer clear of pitfalls and ensure your measurements are precise and dependable.
- Mistake 1: Inaccurate Level Placement
Ensuring your level is perfectly horizontal is crucial for an accurate run measurement. An uneven level can lead to incorrect calculations, affecting every subsequent step. Always check the level’s bubble to confirm it’s centered before measuring. - Mistake 2: Neglecting Safety Precautions
Safety should always come first, yet it’s often overlooked in the eagerness to get the job done. Skimping on safety gear or using an unstable ladder can result in accidents. Invest in proper safety equipment and follow best practices to prevent injuries. - Mistake 3: Mismeasuring the Run or Rise
It’s tempting to eyeball measurements, but even the slightest error in the run or rise can drastically skew the pitch calculation. Carefully measure each section twice if necessary, and always use a tape measure for precision. - Mistake 4: Using the Wrong Measurement Units
Mixing up metric and imperial units is a common error that can invalidate your pitch degree. Confirm the units you are using and stick with them throughout the process to maintain consistency. - Mistake 5: Overlooking Obstructions
Before taking measurements, ensure there are no obstructions like chimney pipes or satellite dishes that might affect your accuracy. These can impede your ability to get a straight run or rise line and should be accounted for or worked around. - Mistake 6: Calculating without a Calculator
Even if you’re good with numbers, using an online calculator designed to convert pitch ratios into degrees is always advised for precision. This helps avoid the human error that often comes with manual calculations. - Mistake 7: Failing to Double-Check Measurements
It’s all too easy to write down a number and move on, but it’s essential to double-check your measurements. This second look can catch any potential errors and save you from future headaches. - Mistake 8: Poor Documentation
Your calculations are invaluable for future roofing work, so documenting them poorly is a disservice. Keep records clear and organized, noting the date and conditions of your measurement for future reference.
Measuring and Calculating Your Roof Pitch
Once you’ve prepared the area, it’s time to start measuring the roof’s pitch. Position your level horizontally on the roof, and use the tape measure to find the 12-inch mark from where the level touches the roofing surface. This first measurement is your ‘run,’ and ensuring it’s done correctly is crucial for an accurate pitch calculation.
Next, measure the vertical distance from the end of the level straight down to the roof at the 12-inch mark; this is your ‘rise.’ With both the rise and run recorded, use the pitch calculation formula or an online roof angle calculator to determine the degree of your roof’s pitch. Documenting this information carefully is key as it informs not just repairs but can be essential for any insurance claims related to your roof, which Adam Quenneville can assist with.