• Essential signs to spot roof damage early, saving time and avoiding costly repairs
• Detailed step-by-step guide on how to measure a roof for homeowners
• Common mistakes to avoid in DIY roof measurement and the importance of professional consultation
Recognizing Warning Signs
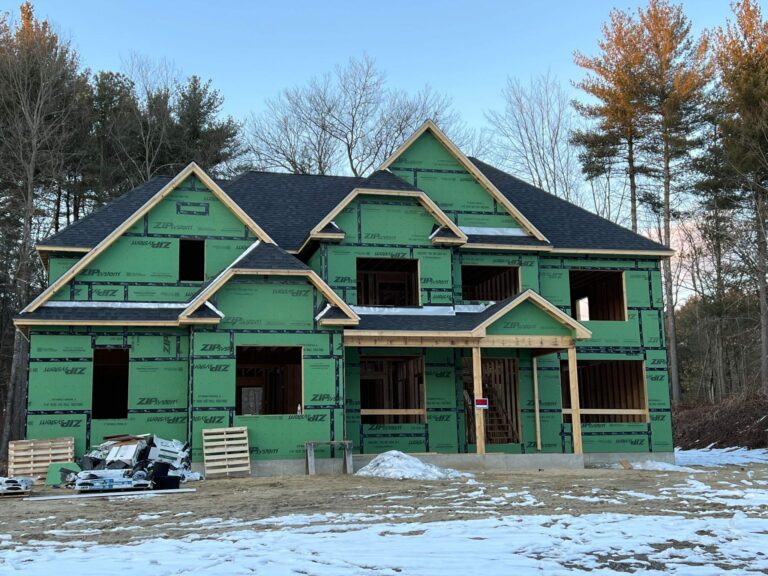
Maintaining a solid and reliable roof is a cornerstone of good home maintenance, especially in the varied climates of Connecticut. Before you start to measure the square footage, it’s crucial to identify the need for such an endeavor. If you notice missing shingles, damage from fallen branches, or leaking areas after a storm, your roof likely requires attention. These signs can indicate underlying issues that may become severe problems if not addressed promptly.
Assessing Wear and Tear
Continuous exposure to sun, wind, rain, and the occasional ice and snow can take a toll on your roof’s condition. Look for cracked, curling, or buckling shingles, as these are telltale signs that your roof’s lifespan is progressing. Inspect the flashing around vents, chimneys, and other roof protrusions as these areas are prone to leaks. Even signs of moss or algae growth suggest trapped moisture, which could eventually lead to wood rot beneath the shingles.
Internal Signs of Roof Deterioration
It’s also critical to check the inside of your home for symptoms of a failing roof. Sagging decking between rafters, water damage or staining on ceilings, and visible light coming through the attic are all indicators that your roof may need repairs or replacement. Taking action before these issues escalate ensures the safety and integrity of your home, preventing the potentially severe consequences of roof neglect.
Essential Roof Measurement Steps
Before tackling how to measure a roof, having the right tools and safety measures in place is critical for homeowners. A sturdy ladder, proper footgear, and a safety harness are your starting trio for a secure process. Next, arm yourself with a dependable measuring tape, a notepad for jotting down your numbers, and a calculator for on-the-spot calculations. For an even safer alternative, consider using technology such as a drone or satellite imaging tools, available through specialized services, to capture precise roof dimensions without setting foot on the ladder.
Calculating Roof Size with Precision
With safety and tools ready, it’s time to measure the roof’s slope and the area of each plane. Your goal is to gather accurate data that will guide material purchases and inform any needed repairs. Keep in mind the necessity to include overhangs in these measurements, as they play a significant role in material estimation for your roofing project. When all measurements are taken, don’t hesitate to consult a professional for a comprehensive understanding of your roof’s needs, which you can find through our residential roofing services.
Step 1: Prepare for Safety
Ensure you have the necessary safety equipment, such as a sturdy ladder, non-slip shoes, and a safety harness. Always have someone nearby to assist in case of an emergency.
Step 2: Gather Your Tools
Collect a measuring tape (long enough to measure the run length of the roof), a notepad, a calculator, and, if available, a drone or satellite imaging tool for a safer approach.
Step 3: Measure the Slope
Determine the slope of your roof by measuring 12 inches horizontally (the run) from the edge of the roof upwards vertically (the rise) until you reach the roof surface.
Step 4: Calculate the Area of a Single Plane
Measure the length and width of one plane (section) of the roof. Multiply these numbers together to get the area in square feet for that plane.
Step 5: Add Complexity for Accuracy
For a more complex roof, repeat the measurements for each plane and add the sum of each area to get the total square footage of the roof.
Step 6: Include Overhangs in Your Measurements
Don’t forget to include the length of any overhangs in your measurements, as they are a part of the total roof area that will need materials.
Step 7: Calculate Roofing Materials
Use the total area measurement to estimate the number of roofing materials required, ensuring you add 10-15% extra for waste and overage.
Step 8: Consult with an Expert
Review the measurements and calculations with a roofing professional to confirm accuracy before purchasing materials or beginning any roofing work.
Avoiding Common Measurement Mistakes
When embarking on the process of measuring your roof, precision is paramount to ensure success. DIY roof measurement can often lead to errors if not done carefully, potentially resulting in wasted materials and funds. Understanding the pitfalls to avoid can make all the difference in a smooth DIY experience.
Mistake 1: Neglecting Safety Precautions
Many homeowners underestimate the hazards involved in roof work. To prevent this, use a sturdy ladder, wear non-slip shoes, and utilize a safety harness. Always have someone nearby in case assistance is needed to ensure a secure and safe measuring process.
Mistake 2: Using Inadequate Measuring Tools
Attempting to measure a roof with a short tape measure is a frequent and flawed practice. Ensure to use a measuring tape long enough to cover the roof’s run length to avoid inaccuracies. For an added layer of precision and safety, consider leveraging drone or satellite imaging tools, which can provide distant measurements without the need for precarious balancing acts.
Mistake 3: Overlooking the Roof’s Slope
Failing to measure the slope correctly can lead to improper material estimates. Measure the slope by taking a 12-inch horizontal run from the edge of the roof and measure vertically (the rise) until you reach the roof surface. This determination will guide you in calculating the true area of the roof for an accurate material estimate.
Mistake 4: Ignoring Overhangs and Complex Planes
A frequently overlooked mistake is forgetting to include roof overhangs and neglecting the complexity of the roof design. Measure each plane of the roof, including overhangs, and meticulously add them together to calculate the total square footage. Ignoring these aspects can lead to underordering materials, which can halt your project mid-way through completion.
Mistake 5: Inaccurate Calculation of Materials
Underestimating the materials needed is a common downfall of many DIY projects. Utilize the total area measurement to estimate the number of materials and be sure to add a surplus of 10-15% to account for waste and overage. Taking this step can prevent additional time and cost from project delays.
Mistake 6: Failing to Verify Measurements with a Professional
After completing your measurements and calculations, a crucial step often skipped is verification with a professional. Consulting with an expert can confirm the accuracy of your work and provide peace of mind before investing in materials. This can save considerable time and resources, providing assurance that the project is on the right track from the start.
Estimating Materials for Your Roof
Once you have your roof dimensions, the next step is to estimate the required roofing materials. This includes not only shingles but also underlayment, flashing, and ridge caps. It’s crucial to add an extra 10-15% to cater for potential waste and to ensure you’re covered for any unexpected issues, a practice Adam Quenneville strongly advises.
Engaging with Professionals for Quality Assurance
Calculating your needs accurately is instrumental in protecting the longevity of your roof. However, partnering with seasoned experts to review your calculations before making any purchases is a wise move. They can offer valuable insights into the best materials and installation techniques for your specific roof type, all of which you can explore through our roof materials service.