• Understand the urgency: Learn to quickly identify signs of a leaking roof and why immediate action is necessary
• Step-by-step guidance: Follow our expert how-to guide on fixing leaks, from assessment to temporary fixes and shingle replacement
• Professional expertise: Discover why professional help is invaluable for roof repair and maintenance, with links to our services and updates
Recognizing the Alarming Signs
The first sign of a leaking roof is often a water stain that resembles a dark or damp patch on the ceiling, a clear red flag not to be ignored. These stains typically signal that water is pooling on the other side, indicating a breach somewhere on your roof. Another symptom to be wary of is the presence of dampness along the walls, which might not be as immediately noticeable as ceiling stains but is equally telling. It’s imperative to investigate these signs promptly as they can be the precursors to more significant damage.
Attic Investigations
A visit to the attic can offer a wealth of information; light filtering through the boards is a straightforward indicator of a potential leak site. Daytime is the best time for this examination, as any penetration will be most evident. While up there, it’s also a good idea to check for insulation that feels damp to the touch, which could indicate water ingress. Remember, insulation effectiveness is compromised when wet, affecting your home’s thermal efficiency and necessitating quick action.
Dealing with Drip: Initial Response
When faced with active dripping, containing the water should be your immediate response to prevent damage to your home’s interior. A simple bucket or pan placed strategically under the leak can save you from a multitude of complications until permanent repairs are undertaken. This is a temporary mitigation step before addressing the root cause. Combining swift action with the right know-how, homeowners can transition from detection to repair, keeping their abodes secure and dry.
Finding the Source of the Problem
Once you’ve identified the telltale signs of a leak in your roof, the next logical step is pinpointing its exact origin. It’s a common misconception that the leak’s location is directly above the interior damage—water travels, often in unexpected ways. To effectively trace the path of intrusion, examine the underside of the roof for dampness or discoloration that may indicate the water’s journey. Moving step-by-step methodically from the interior stain outward is your best strategy for locating the elusive leak.
Temporary Solutions to Mitigate Damage
While a permanent fix is ideal, the reality of life sometimes calls for immediate, temporary solutions to manage a leaking roof. Patching the identified leak with durable, waterproof materials like roofing tar can offer quick relief from active leaks. Over this tar, you can place shingles or plywood as a protective overlay, keeping in mind this is just a band-aid fix until more comprehensive repairs can be made. For homeowners needing professional assistance, Adam Quenneville offers the expertise to ensure these interim solutions are safely implemented and effective.
Step 1: Assess the Damage
Begin by evaluating the extent of the leak. Visit your attic or the highest point in your home during the daytime. Look for any signs of water damage, wet insulation, or sunlight coming through the roof.
Step 2: Locate the Source
Sometimes, the source of the leak is not directly above the damage. Water can travel along roof panels or lumber in the attic. Look for wet spots on the roof decking or rafters that could indicate the source.
Step 3: Contain the Water
If the roof is actively leaking, place a bucket or container underneath the site to catch the dripping water. This will help to prevent further damage to your interior.
Step 4: Temporarily Patch the Leak
Apply a piece of roofing tar to the area where you suspect the leak is coming from, and place a piece of plywood or shingle on top of the tar to act as a temporary fix.
Step 5: Inspect Roofing Materials
Examine the roofing materials from the outside. Look for missing, damaged, or aged shingles that could be the cause of the leak, paying special attention to roof valleys and flashing.
Step 6: Replace Damaged Shingles
Carefully remove any compromised shingles and replace them with new ones. Ensure that you’re following the manufacturer’s instructions for proper installation to prevent future leaks.
Step 7: Seal Joints and Edges
Apply roofing cement to seal the edges of the new shingles and around any roofing features like vents, chimneys, or skylights to reinforce the areas prone to leaks.
Step 8: Schedule Regular Maintenance
To prevent future leaks, have your roof inspected regularly especially after harsh weather conditions. Check for damages and ensure that all seals and shingles are intact.
Common DIY Roof Repair Mistakes to Avoid
When embarking on the task of fixing a leaking roof, it’s as important to know what not to do as it is to follow the correct steps. Although DIY roof repair can be cost-effective, certain missteps can lead to more problems than solutions. Here are some common errors to steer clear of while addressing roof issues to ensure the integrity of your home isn’t compromised.
Mistake 1: Ignoring Safety Precautions
Many homeowners underestimate the dangers associated with roof repairs. Always use a sturdy ladder, wear non-slip shoes, and consider a safety harness when working at heights. Overlooking safety can lead to severe injuries.
Mistake 2: Poor Leak Assessment
A hasty inspection can result in an incorrect identification of the leak source. Take your time when assessing the damage and remember that water can travel far from the original entry point. Missing the exact location of the leak can lead to ineffective repairs.
Mistake 3: Inadequate Containment
Failing to contain the water properly can lead to further interior damage. Make sure to place a large enough container to catch all the drips and check it regularly—especially if it’s raining— to prevent overflow and additional damage to the surroundings.
Mistake 4: Using Improper Patching Materials
Using materials such as duct tape or quick fixes that are not designed for roofing can result in a short-lived solution and potentially more leakage. Utilize proper roofing tar and a solid patch like a piece of shingle or plywood applied appropriately to create a waterproof barrier until you can perform a permanent repair.
Mistake 5: Overlooking Roofing Material Damage
Not thoroughly examining the shingles can leave damaged materials on the roof. Always check for cracks, breaks, and other signs of damage on the shingles and underlayment to prevent recurrence of the problem.
Mistake 6: Incorrect Shingle Replacement
Improper installation of new shingles can lead to the same or new leaks. Make sure to follow the manufacturer’s instructions and local building codes when replacing shingles to ensure a watertight roof.
Mistake 7: Neglecting to Seal Joints and Edges
Leaving joints and edges unsealed is a common oversight that can allow water to penetrate once again. Apply roofing cement to seal these vulnerable areas, especially around protrusions like vents and chimneys.
Mistake 8: Deferring Regular Maintenance
Not scheduling regular inspections can lead to unnoticed damage until it’s too late. Periodic professional evaluations, particularly after severe weather, are critical to maintain a well-functioning roof and identifying potential issues.
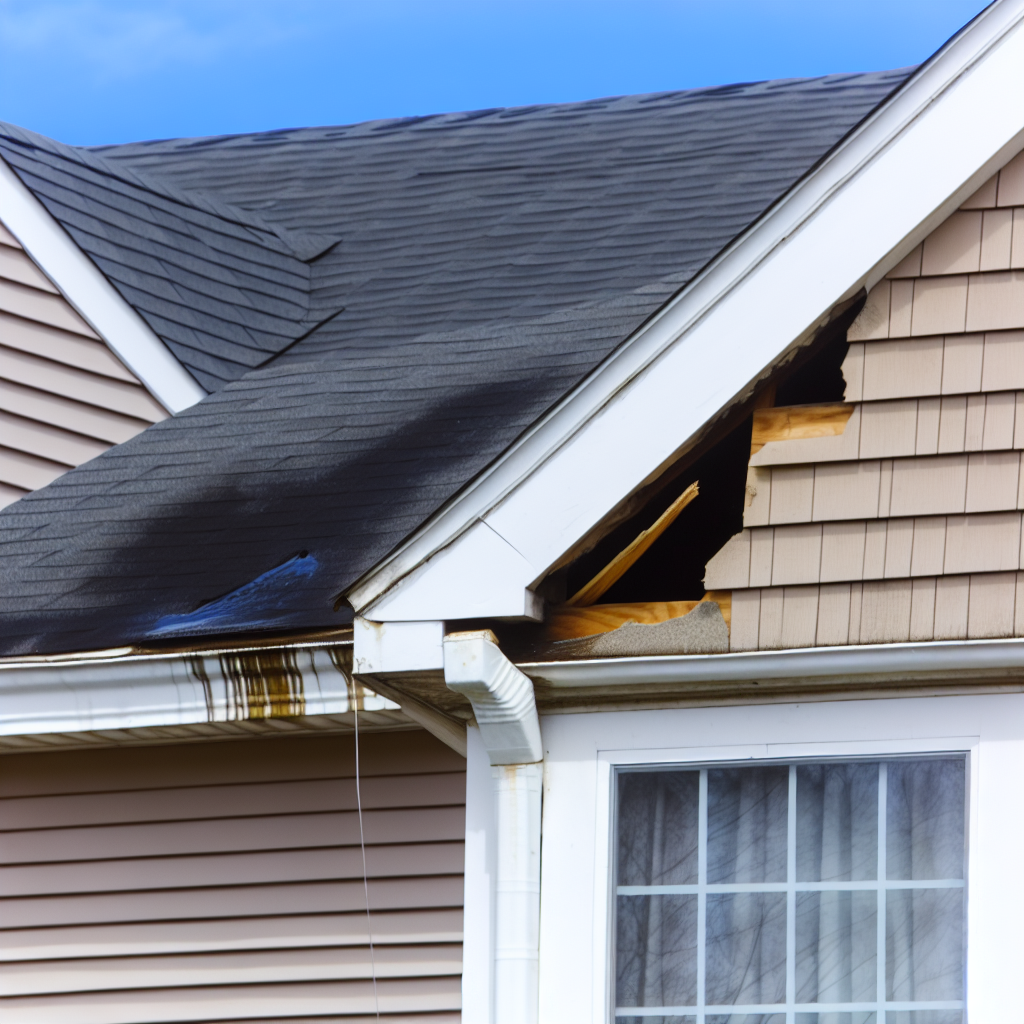
Inspection and Repair of Damaged Roofing
Upon securing a temporary fix, a thorough external inspection of your roof is paramount to ascertain the full extent of the damage. This crucial step involves looking for missing, damaged, or worn shingles which are often culprits for leaks, particularly after Maine’s harsh winter season. Ensuring these flaws are addressed is key in safeguarding your home against future water invasion and the potential damage that follows.
Professional Intervention and Maintenance
While DIY repairs can be effective, some situations necessitate the expertise of a professional, like those at Adam Quenneville, especially when it comes to complex roofing systems or significant damage. Regular maintenance checks, ideally biannually, are essential in proactively identifying vulnerabilities before they lead to leaks. Professional roofers will not only fix existing issues but can provide invaluable advice on preventing future leaks, saving homeowners time and money in the long run.